A weather forecast widget displays the updated weather conditions on your website so as to provide convenience for visitors who wonder about temperature, humidity, wind gusts, or some other information about the weather. In some cases, adding a weather forecast widget to your WordPress website is regarded as a thoughtful idea to deliver great user experience.
If you plan to do so and have no idea how to enable an accurate weather forecast for your site, then you should follow this guide which helps you settle a matter with wp-forecast plugin. This is a powerful plugin designed for showing weather data on any web pages, posts or sidebar, which has won over 160,000 downloads. Before everything, let’s get started to search for this plugin and install it via your admin.
Install & Activate wp-forecast
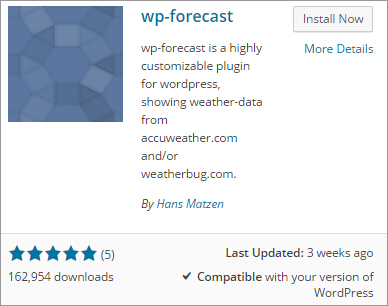
Log into your WordPress dashboard and search for wp-forecast via Plugins > Add New. Pitch on the search result as the following screenshot and click “Install Now”. Activate this plugin since you have successfully installed wp-forecast on your website.
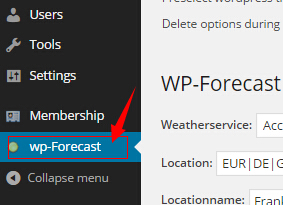
And then, an item called wp-forecast is newly included in the dashboard sidebar.
Set Up wp-forecast
Click wp-forecast option and go to the wp-forecast setting page. First of all, let’s focus on the WP-Forecast Setup mode where to modify some basic settings of your weather widget. In this section, you are required to select a weather service from the drop-down list, which includes AccuWeather and WeatherBug.
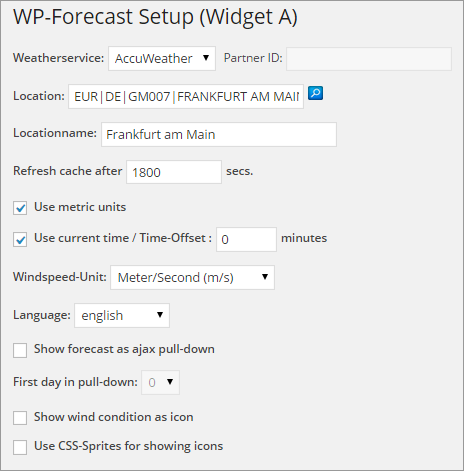
The Location field is where to target your current location so as to help this widget make an accurate judgment of the weather conditions. Click the magnifier icon and enter the correct name of your location in the Searchterm field. “Search Location” and pitch on one of the most suitable search results from the list. And then, name your location properly in the Locationname field.
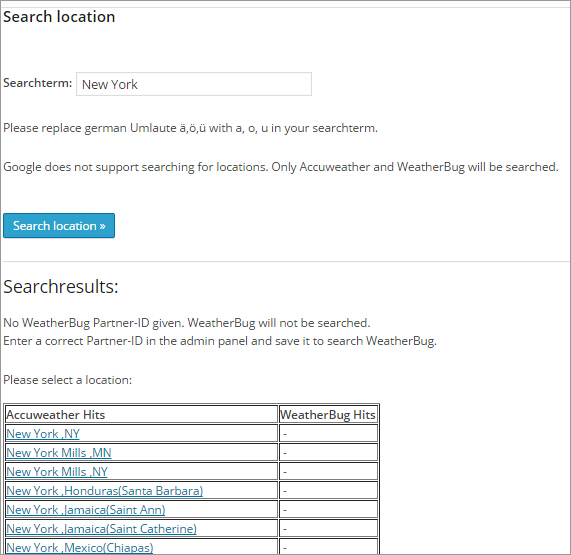
The left options allow you to set how often to refresh each cache and the unit of windspeed. To satisfy the needs of users from different countries, this plugin enables multiple languages for you to choose from. Customize all those options as required and then click “Update options” button to confirm all changes.
And then, move to the Display Configuration mode and this is where to customize the appearance of your weather forecast widget.
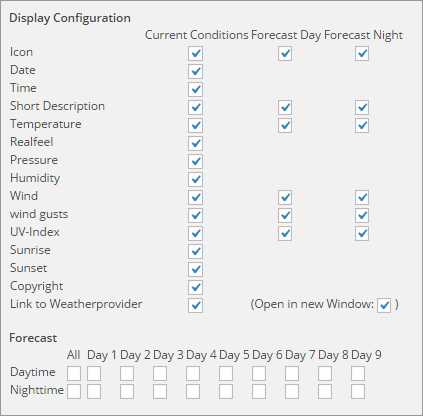
Here, you can determine how many factors should be shown on the widget, such as date, time, temperature, and so on. Besides, you should make certain the time quantum of the weather forecast. Take a good use of those options and create a weather forecast widget with great looking.
Note that, wp-forecast allows you to create as many weather forecast widgets as you need. You can set the number of wp-forecast as needed on the top of this setting page. In addition, the number of available widgets, timeout for weartherprovider connections and preselect wordpress transfer method are all included in this section as the following screenshot.

Display Weather Forecast Widget on Your Website
After creating a new weather forecast widget, you need to showcase it on anywhere of your website according to personal needs. Go to Appearance > Widgets and target the item called WP Forecast via Available Widgets. For instance, we plan to add a weather forecast widget to the dynamic sidebar, so we need to drag & drop the WP Forecast item to the Page Sidebar section on the right page.
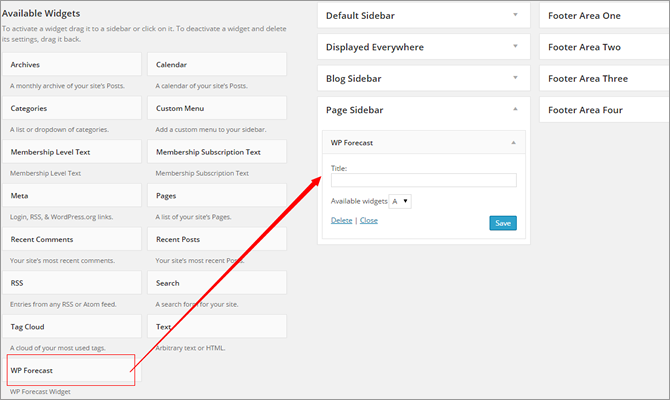
To display more weather forecast widgets on your website, you should move to the bottom of this page and select number of widgets as needed.

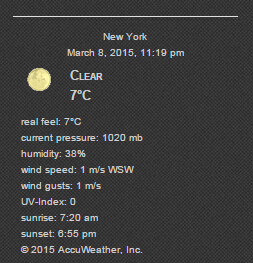
Here, we would like to show you the weather forecast widget set by following this step-by-step guide as below.
In addition to wp-forecast, there are many other plugins also available for you to create a great weather forecast widget, such as Weather Underground, Yahoo! Weather Forecasts, My Weather, and so on.


