Since widget plays an important role in displaying the essence of a website, many webmasters prefer to add various widgets to the web page sidebar. A sidebar takes responsibility for accepting all widgets and arranging them in perfect order. In this way, more and more people tend to make use of a premium theme with customizable sidebar.
However, if the active theme cannot allow you to drag and drop widgets included in the sidebar in an easy manner, then adding dynamic sidebars to your WordPress website or to do so with the help of a powerful plugin are great methods for you. The following guide briefs you on how to enable dynamic sidebars for your site with coding stuff and WordPress plugin.
Add Dynamic Sidebars by Updating functions.php
The use of coding stuff is a flexible and technical way to achieve the goal. Here, we are going to make some changes to the theme’s functions.php file. Log into your WordPress dashboard and go to Appearance > Editor. Target the Theme Functions (functions.php) file on the right sidebar and open it meanwhile. And now, add the following code to this file.
function register_hr360_widgets()
{
    register_sidebar(array(
        'name' => __( 'Main Sidebar', 'hr360' ),
        'id' => 'sidebar-hr360',
        'description' => __( 'This is the main sidebar appearing on the right page', 'hr360' ),
        'before_widget' => '<aside id="%1$s" class="widget %2$s">',
        'after_widget' => '</aside>',
        'before_title' => '<h3 class="widget-title">',
        'after_title' => '</h3>' ) );

    register_sidebar( array(
        'name' =>__( 'Front page sidebar', 'hr360'),
        'id' => 'sidebar-2',
        'description' => __( 'This is the front page sidebar appearing on the static front page template', 'hr360' ),
        'before_widget' => '<aside id="%1$s" class="widget %2$s">',
        'after_widget' => '</aside>',
        'before_title' => '<h3 class="widget-title">',
        'after_title' => '</h3>' ) );
}

add_action( 'widgets_init', 'register_hr360_widgets' );
Note that, the code mentioned above helps you generate two sidebars on the website, including a main sidebar and a front page sidebar. Here, we name the theme as “hr360″, which can be replaced to your active theme name as needed. If you just need to show your visitors one sidebar, then you can leave out the second register_sidebar part. Besides, you can also replace the parameters contained in before_widget and after_widget if needed and adjust the font size to make the sidebar match with your website perfectly.
Since you have added more than one sidebar on the website, you are required to make a distinction between those sidebars by using the id command. By default, the id for a sidebar is “sidebar-1″, “sidebar-2″, or “sidebar-3″. Certainly, you are allowed to modify the id of a sidebar based your own needs.
And now, it is possible for you to drag and drop any widgets via Appearance > Widgets with facility. However, to display the newly created dynamic sidebars on your website, you need to add specific code as below to any templates where show off the sidebars. For example, you can add the following code to sidebar.php file to showcase the dynamic sidebars in the sidebar area. Likewise, if you determine to show visitors the dynamic sidebars in the footer area, then the code should be added to footer.php file.
<?php if ( is_active_sidebar( 'sidebar-hr360' ) ) : ?>
    <div id="secondary" class="widget-area" role="complementary">
    <?php dynamic_sidebar( 'sidebar-hr360' ); ?>
    </div>
<?php endif; ?>
Note that, the sidebar-hr360 should be replaced to the id of any sidebar that is going to be shown on your web page. Perhaps, if you change your mind and wish to display another sidebar, you can change the sidebar id to this end.
Since many readers get used to solving problems with WordPress plugin, we would like to show you the second method to add dynamic sidebars to WordPress website, namely, take a good use of WP Dynamic Sidebar.
Add Dynamic Sidebars with WP Dynamic Sidebar
WordPress developers have released multiple plugins to simplify the process of creating dynamic sidebars, such as WP Dynamic Sidebar, Dynamic Sidebars, Dynamic Sidebar Menu, and so on. Among those options, WP Dynamic Sidebar is selected in the following guide thanks to its high popularity and usability. Besides, this plugin has been recognized as a great method to manage WordPress sidebars and widgets.
Since you have activated this plugin on your website, you just need to create dynamic sidebars via an understandable interface and then add the generated shortcode to anywhere that you want to display the newly created sidebar. Before everything, let’s get started to install this great plugin via WordPress dashboard.
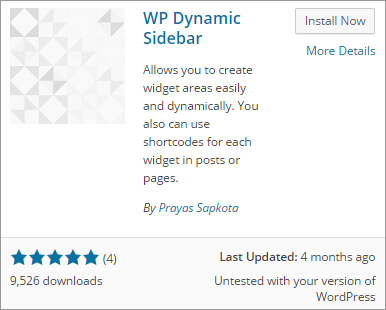
Go to Plugins > Add New to search for WP Dynamic Sidebar plugin. Since the result as below is brought out, you are required to click “Install Now” upon activating this plugin.
Once activating WP Dynamic Sidebar, the plugin setting page comes to you automatically as the following screenshot and a new item called “WP Dynamic Sidebar” appears under Settings.
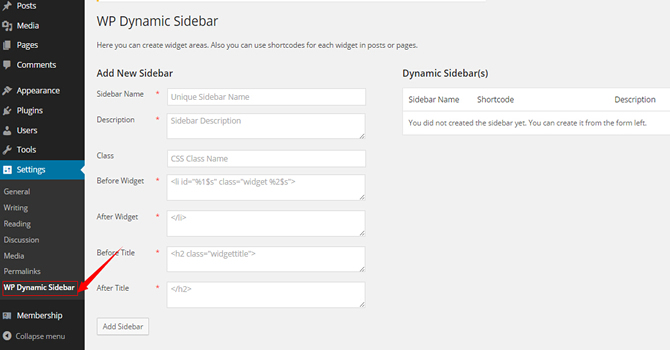
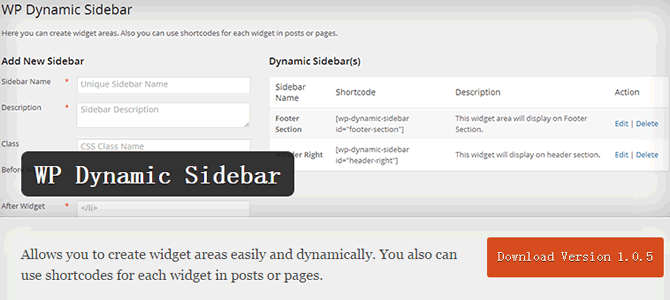
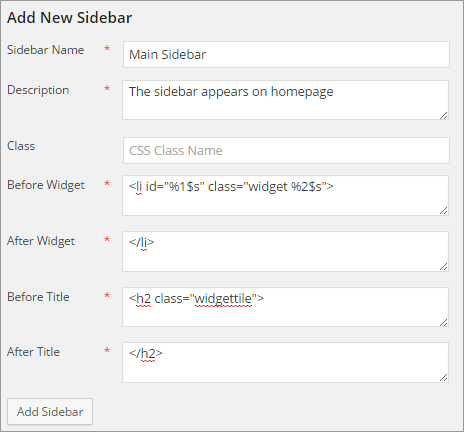
As we can see in the above screenshot, there are two columns included in the setting page, namely, Add New Sidebar and Dynamic Sidebar(s). You can create new sidebar in the first mode while edit the created sidebars via the right column. Since a new sidebar requires a unique name and a brief description, we name our first dynamic sidebar as Main Sidebar and describe it as “The sidebar appears on homepage”.
The “Before Widget” and “After Widget” are used to make widget work for your website correctly. The default setting is <li id=”%1$s” class=”widget %2$s”> and the parameters can be changed if needed. Besides, the “Before Title” and “After Title” are used to contain the widget title and adjust the font size. Finally, click “Add Sidebar” to confirm all information.
Once confirming all settings, your first dynamic sidebar is generated and included in the Dynamic Sidebar(s) mode. Here comes a shortcode automatically, which should be added to a certain page where to show this sidebar. Note that, you are able to create as many sidebars as you want and edit/delete a sidebar via Dynamic Sidebar(s) mode.
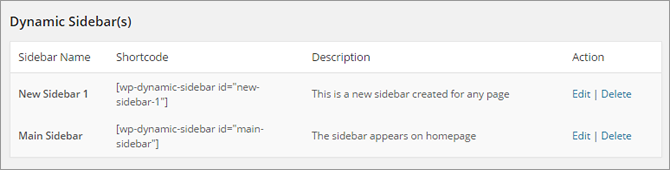
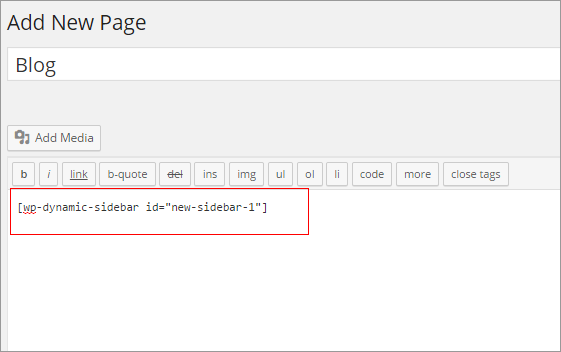
For example, if you have created a sidebar for the blog page, then you are required to access to the page editor via Pages > All Pages and copy & paste the sidebar shortcode to this page. In the same way, you can put the newly created sidebars in everywhere within your website. This plugin enables you to modify the details of a sidebar in any time if needed.
In general, both methods are easy to handle and help you settle a matter without difficulty. Select the more suitable one according to your preference and go into action right now.
Summary
Since dynamic sidebar is a great method to manage all widgets so as to make your web pages well-ordered, we hope you can give the above-mentioned methods a try and make an ordered website design.
Related Posts
 How to Manage WordPress Sidebars and Widgets
 How to Add a Weather Forecast Widget to Your WordPress Site
 3 Easy Ways to Add Twitter Feed to WordPress
 How to Create and Manage a WordPress Custom Menu
 Best WordPress Forum Plugins for Creating an Attractive Forum
 How to Display Multi-Column Content in WordPress Pages and Posts
 How to Add and Use Breadcrumbs in WordPress
 Top 10 WordPress Menu Plugins Richening the Menu Functions