
The sidebar is a tactical element of every WordPress site. Although one in every six websites runs on WordPress platform, there are many website owners and developers who do not succeed in using the sidebars efficiently. This is mainly because the use and efficiency of sidebars in WordPress are considerably more flexible than in other content management systems. For this reason, while most of the CMSs only offer sidebar as a part of theme’s layout, WordPress treats it as a dynamic spot for enhancing the appearance and utility of the website.
As there are numerous webmasters who under-utilize the sidebars for the website layout and design, we’d like to discuss the tips and tricks on how to manage the WordPress sidebars and widgets.
Best Tips to Manage WordPress Sidebars and Widgets Manually
In fact, besides the header, footer and main content of every webpage, sidebars are a crucial part of every WordPress site. In simple words, sidebars are located on the right or left section of a page. Being the owner or developer, you may want to configure or modify content of your sidebars to display anything you want. In the following, we have listed the basic knowledge as well as the tricks to deal with the WordPress sidebars effectively.
- Templates for Sidebars – WordPress sidebar templates are the files where you specify a tag for making changes to the sidebars. Named as the sidebar.php, you can add any coding to this file to refine your sidebars. To make the most use of this crucial element, experienced developers convert sidebars to widgetized sections. Now, how can you add a widget to a sidebar? Well, we have discussed later.
- Flexible Sidebars – WordPress provides an advanced platform where you can create and locate dynamic sidebars in your site. As the name speaks, these sidebars are so flexible that you can both create a template and place the widgetized area at anywhere in a webpage.
Creating a Widgetized Sidebar
To begin with, you should dig into the functions.php file of the activated theme of your site, and apply the register_sidebar option. The easiest way of doing so is by using the following shortcode in the functions.php file through your admin panel.
add_action('widgets_init', 'below_post_sidebar');
function below_post_sidebar()
{
    register_sidebar(
        array(
            'id' => 'below-post',
            'name' => __( 'Below Post' ),
            'description' => __( 'Your Description Here' ),
            'class' => 'widget-class',
            'before_title' => '<h3 class="widget-title">',
            'after_title' => '</h3>',
            'before_widget' => '<div id="%1$s" class="widget %2$s">',
            'after_widget' => '</div>'
        )
    );
}
Using the above-listed code provides you with the flexibility to configure the sidebars based on your preferences. You will need to enter several things to customize your sidebars and widgets. To be accurate, you have to fill up the id, name as well as the description appropriately for locating the widgetized sidebar. Apart from the basic information, you can play with the class, before_widget, after_widget, before_title and after_title parameters to customize the appearance of the sidebar.
Adding Content to the Sidebar
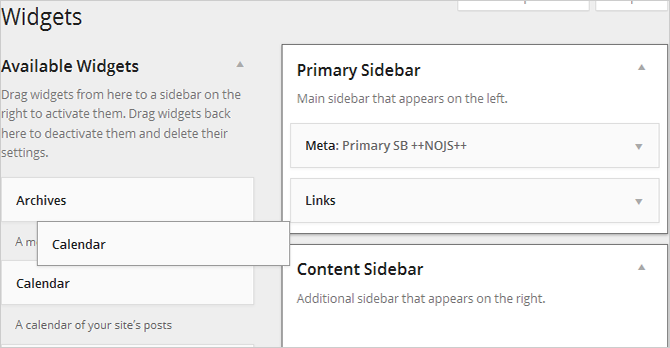
Once you create the sidebars successfully, the process of managing the widgets is half done! For adding content, you can simply drag the widgets from the admin panel and drop it on the customized sidebar. Although you can insert multiple widgets as you want into the dynamic sidebars, it is recommendable that only the suitable widgets can be presented in the widgetized areas.
For instance, you can create an About Me widget at the end of the content section to provide basic information about yourself. Similarly, you can create Author Bio and Meta tags widgets that are added to the content of your site.
Adding the Customized Sidebar to Themes
After you adding the desirable content into the sidebars, it’s time to refine its presence on your site. For this reason, you have to modify the function dynamic_sidebar in the single.php file for adding the widget and displaying it in the preferable area of your webpage. Note that this file needs to be added into your child theme in case the further update of your parent template.
Now, all you need to do is to insert the widgetized area’s title into the function. For example, if you want to locate the widgetized area below the content, you should pass the following function:
<?php dynamic_sidebar( 'below-post' ); ?>
Plugins for Managing Sidebars and Widgets
Listed here are some effective plugins that can be used for managing the sidebars and widgets, in case that you do not prefer using shortcodes or coding stuff.
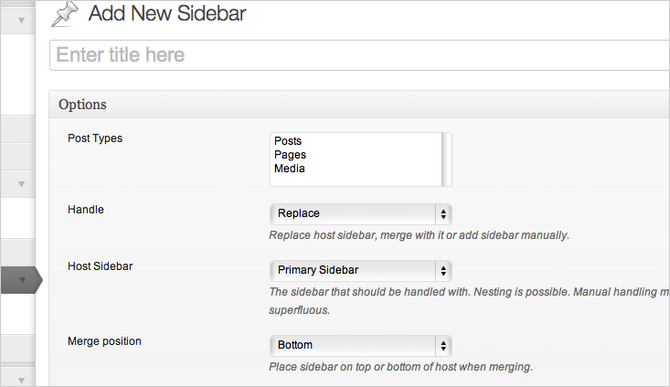
Content-Aware Sidebars
Website:https://wordpress.org/plugins/content-aware-sidebars/
The plugin provides you with an easy platform to choose the most appropriate widgetized areas for different posts and pages. It allows you to manage the sidebars through the admin panel, setting the exact locations and types of the sidebars, as well as creating and placing them on your site with drag & drop functions.
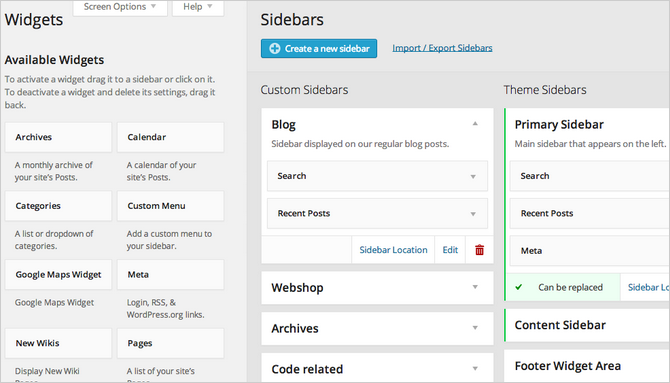
Custom Sidebars
Website: https://wordpress.org/plugins/custom-sidebars/
Regarded as a powerful plugin for managing sidebars, the Custom Sidebars comes with multiple sets of widgets that can be customized depending upon the posts, pages and special platforms. If you are looking for the basic configurations of the widgetized areas, you can use the free version, and the full control can be gained by opting for the premium version.
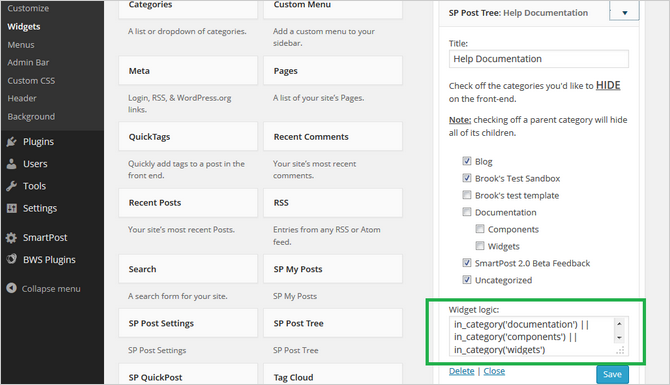
Widget Logic
Website:https://wordpress.org/plugins/widget-logic/
Although this tool requires a fair knowledge of WordPress API, it is a recommendable plugin because it allows to customize the location and pattern of widgets. You can not only create but also customize dynamic sidebars for the unique presence.
Related Posts
 How to Add Dynamic Sidebars to WordPress
 How to Add a Weather Forecast Widget to Your WordPress Site
 Top 10 WordPress Menu Plugins Richening the Menu Functions
 3 Easy Ways to Add Twitter Feed to WordPress
 10 Best WordPress CMS Themes for Blogs, Stores & Magazines
 How to Display Multi-Column Content in WordPress Pages and Posts
 Best 3-Column WordPress Themes Elegant for Gallery Showcasing
 Best WordPress Forum Plugins for Creating an Attractive Forum