
Since WordPress 3.0, users are allowed to create the custom menu and enable more functions on WordPress site. In this way, people are able to add some new items to the menu and make it link to the targeted content. It is an effective method to manage WordPress website. And now, more and more people wish to get an idea about how to create a WordPress custom menu without the need for professional skills. In this post, we make an in-depth guide to answer this question. Note that, there is no menu plugin needed.
Before everything, you are required to make sure that the active theme supports a creation for custom menu. If it leaves no room for custom menu, you have to turn to other themes that can do it. There are multiple premium themes available on WordPress.org featuring the custom menu, such as Custom, Shorty, Prana, and so on. Since everything is all already, let’s move on to the following steps.
Create a WordPress Custom Menu
Honestly, the way to create a WordPress custom menu only needs a few clicks, and it is accessible for all people. First of all, you are required to access to your WordPress dashboard and then go to Appearance > Menus > Create a new menu. Enter a unique menu name as you want. We take “My Menu” as an example and then click Create Menu button.
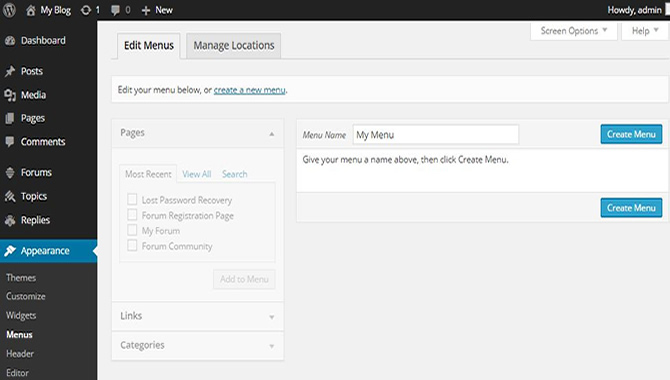
And now, you are on the page like what have shown in the following screenshot. In this step, you are required to add some pages, links or categories to this newly created menu. Here, we would like to explain what you can do with each function.
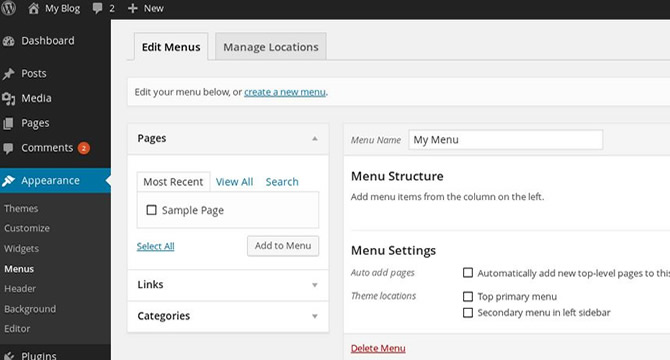
- Pages – All published pages exist in this section. You can add as many pages as you want to the menu.
- Links – This function allows you to add a link to your menu, which can be directed to anywhere as you need. For instance, if you intend a link to a coffee shop site whose URL is http://www.coffeeshop.com, and then you need to enter this URL in the blank and name this item as Coffee Shop.
- Categories – It enables you to add categories to a custom menu with ease. A category can include some related posts or something new on your site, which help you manage web content orderly and allow visitors to target certain posts quickly and efficiently.
Note that, we will focus on Pages option and tell you how to add pages to your menu in the following guide. If there is no page available, you should create some pages right now.
Add Pages to Your Menu
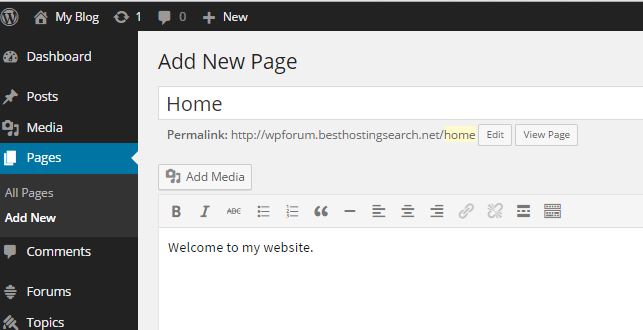
Turn to Pages > Add new and enter the page title and description in the blank. Do it like we have done as below and then click Publish to generate this page.
Go back to Appearance > Menus and Check the newly created Home page in the left column. And then, click Add to Menu and get down to menu edit.
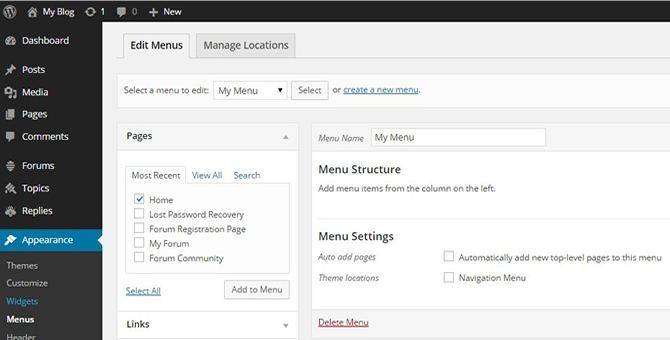
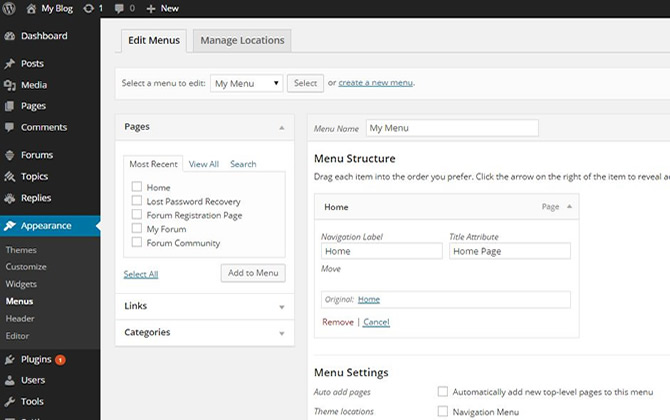
Find the Home page under Menu Structure and click the triangle icon. And now, you are required to edit navigation Label, Title Attribute and Original.
- Navigation Label – It is an item displayed in the menu bar. The default setting of this option is the page title, so there is no need to do any change.
- Title Attribute – It is a description to the page title. Enter some words that can describe the Navigation Label briefly, or just leave it blank.
- Original – It’s fine to leave the default setting, because this option makes you see the original page name.
We give an example in the following screenshot. If you wish to let some newly published pages appear in this menu automatically, then you need to check “Automatically add new top-level pages to this menu”. If not, just leave it. Click Save Menu. And now, you have successfully created a custom menu.
Create WordPress Custom Sub-menu
In general, there is a great deal of information included in a menu. Thus, many webmasters wish to sort out groups of content. We also take the Home page as an example. If you wish to add something about your website to this page, like About Us, Contact Us and My Forum, you are required to create the three pages by complying with the steps mentioned before.
And now, go to Appearance > Menus. Check About Us, Contact Us, My Forum and Home and then click Add to Menu.
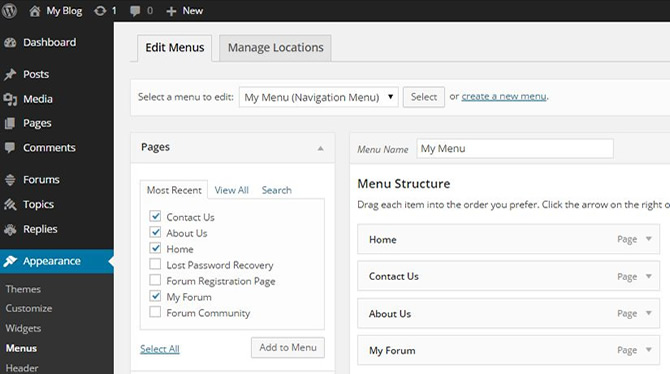
You are required to include the three pages in the Home page by dragging each item slightly to the right. Click Save Menu to save all changes. Finally, it should be like what we show you as below.
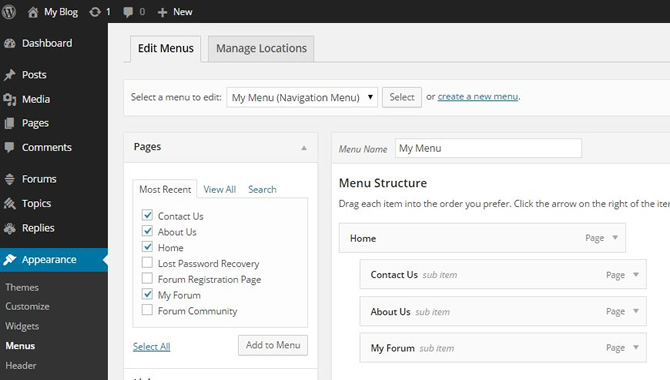
Here we would like to show you a sample made by following the mentioned steps.

Add More Possibilities in Your Custom Menu
If you wish to add more pages to the menu like what we’ve shown as below, you just need to create some pages and then achieve the goal via Appearance > Menus. For instance, we add four newly created pages to our menu, including Newly Updates, Videos, Blog and Affiliate Program. Click Save Menu.
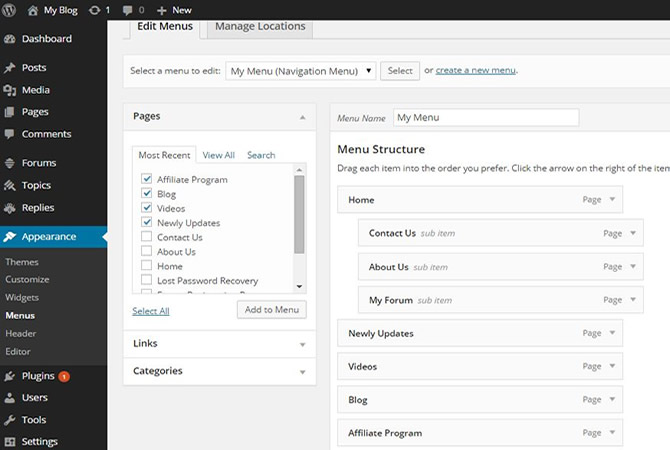
You are allowed to reorder all pages by dragging an item to the target location. The following screenshot shows you a sample made after complying with the mentioned process.

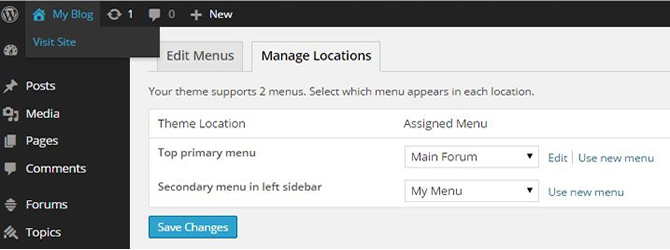
In some cases, you are allowed to create more than one custom menu, which depends on the active theme. Go to Appearance > Menus > Manage Locations to check how many menus are available for your WordPress website. The following screenshot shows that the active theme supports 2 menus, including a top primary menu and a secondary menu in left sidebar. You can make a decision about how to place each custom menu according to your own needs.
By now, we hope you have had an idea about how to create and manage WordPress custom menu and encourage you to get started on your first custom menu right now. In fact, some WordPress menu plugins are also available for the creation of a custom menu, such as Admin Menu Editor, Menu Icons, Responsive Menu, and so on.
For some readers who are not sure about which WordPress hosting company is worth going, we list some recommendations in the following table.


