After reading a pile of in-depth articles on the web and consulted many experienced WordPress users, we have worked out the following tips on how to change WordPress username and password. Changing WordPress username is one of the best tips to improve WordPress site security, because the default username WordPress gives to every user after the installation has been finished makes hacking an easy thing.
In addition, when changing the username, you need to set a strong password to prevent potential attacks. If you use the default username and set a very weak password, your site might be attacked easily by hackers breaking into your password. Therefore, you need to change your username and set a strong password to avoid hacking. If you found your password is too weak after changing the username, you must to change it into a strong one that can’t be broken into easily.
Now, move to the following parts to learn how to change your WordPress username and password to enhance your site security.
Change WordPress Username via WordPress Dashboard
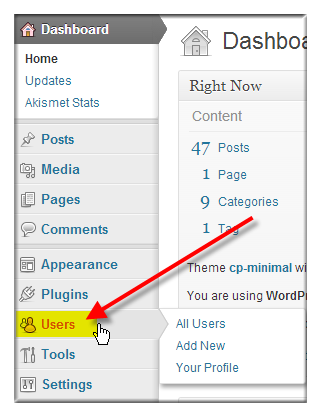
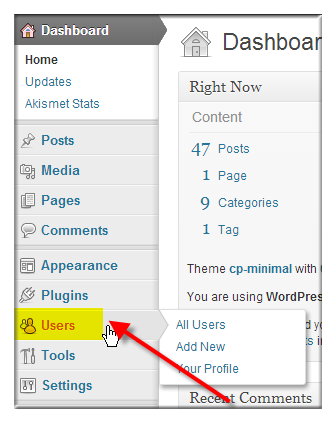
You have to go through a couple of steps to change the default username via WordPress dashboard. The first step is to log into your WordPress dashboard by going to http://yourdomain.com/wp-admin or http://yourdomain.com/wp-login.php. Next, go the “Users” part on the left-hand menu and hover over it. Then, click the second option within this part.

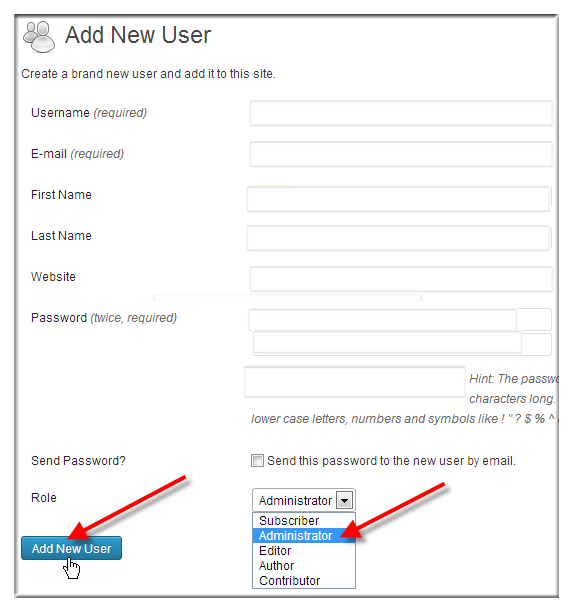
After that, you are able to see a page with 4 blank rectangles that must be filled and other 3 blank rectangles like the following screenshot. You need to type the username you plan to use in the first rectangle and write down an available email address in the second rectangle. Next, type the password twice you want in the last 2 rectangles. Remember to type a strong one to prevent attacks. The other 3 blank rectangles are not required to be filled, but if you like, type your first name, last name and website name in turn. If not, ignore them.
After finishing filling the blank rectangles, choose Administrator in the Role part and click “Add New User” button.
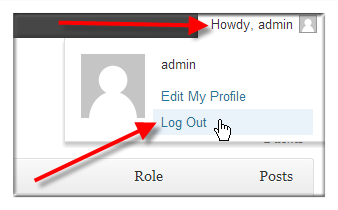
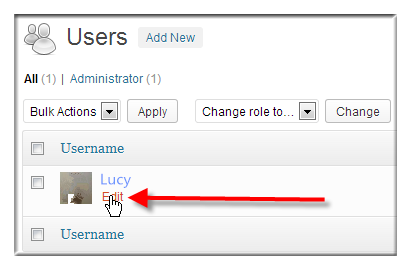
After going through the steps needed to be completed in the former page, you are able to see the new username you have just created. Next, you need to spend some time deleting your default username. First, hover over “Howdy,admin” and click “Log Out”.
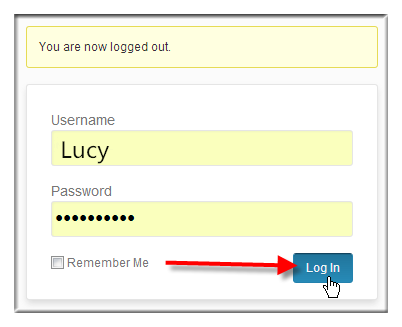
Next, write down your new username and password, and click “Log In” button. If you want the browser to remember you, click the box before “Remember Me”.
Then, click “Users” on the left of the new page and you can see usernames of your site. Just click “Delete” under “admin” to delete this username. In this case, we suggest you to backup your WordPress database to prevent data loss.
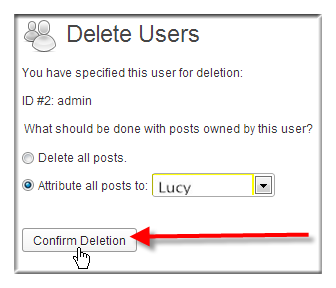
After the former step, you are able to see a page with 2 options like below. Select the second option to attribute all posts to your new username and click “Confirm Deletion”. At this time, you have successfully deleted the default username and changed the username.
Change WordPress Username via phpMyAdmin
In our previous articles, we have displayed the steps of downloading and installing phpMyAdmin, tips on how to export and import a database using phpMyAdmin and methods to use phpMyAdmin to backup database. In below, we have listed the steps of using phpMyAdmin to change the username of your WordPress site. Proceed to the details.
To change your WordPress username via phpMyAdmin, you first need to log into cPanel, click “phpMyAdmin” under “DATABASE” and find your WordPress database from the list on the left.
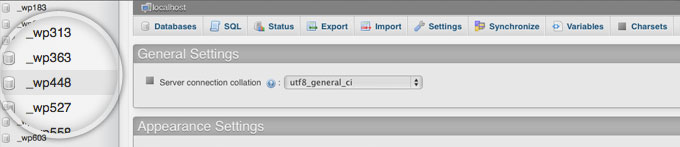
After selecting your WordPress database, you can see a list of tables, and then select the _users table.
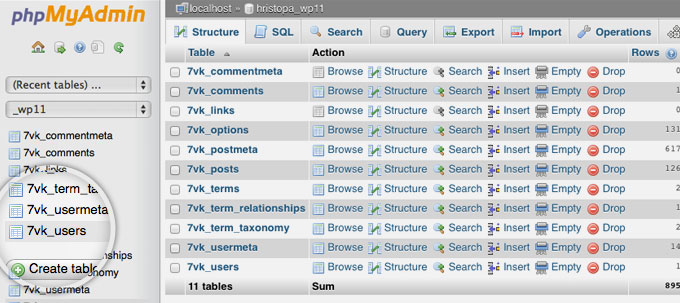
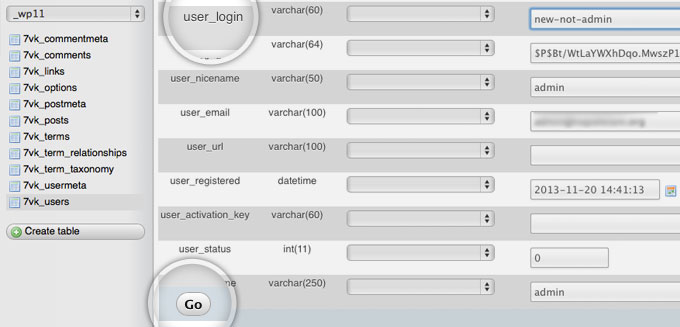
After selecting the _user table, you are able to see all registered users in your site. Go to find the one named as admin, you are able to see multiple choices. At this time, click “Edit” and you can see a page like below. Then, go to “user_login” and type a new username you like to replace admin. Next, click “Go” button to complete the process of changing a username.
Change WordPress Password
Having found several ways to change a WordPress password, we sincerely recommend you to change your password via WordPress dashboard, because this is the easiest method. Now, follow us to see the steps of changing password via dashboard.
Step 1. Click “Users” on the left-hand menu after logging into your dashboard.
Step 2. Locate to your username and click “Edit”.
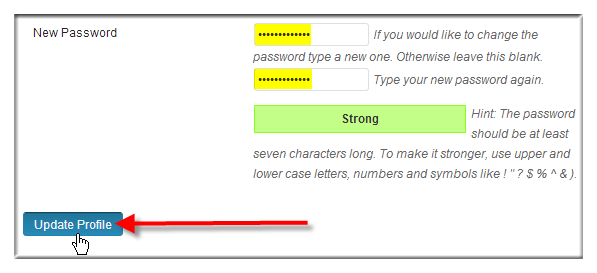
Step 3. Scroll to the bottom of this page and write down the new password twice, which is strong enough. Then, click “Update Profile”. Then, you should see a box telling profile updated. At this time, you have successfully changed your password.
Related Posts
 How to Allow Users to Login with Email in WordPress
 The Useful Tips to Enhance WordPress Login Security
 How to Reset WordPress Admin Password by Using phpMyAdmin
 Add an Admin to WordPress Using SQL Queries via PHPMyAdmin
 How to Use phpMyAdmin to Backup Database
 Common WordPress Security Issues with Large Potential Dangers
 How to Install WordPress Manually?
 How to Improve Security of a WordPress Site?