There are a large number of webmasters looking for the tips on how to install WordPress manually, because they prefer to fully control the process but not to use a 1-click WordPress installer to do their orders. However, it is not easy for most people to install WordPress manually, especially for those people who know little installation information.
Up to now, we also have received many emails from our readers asking for the tips on manual WordPress installation. To provide them with an easy and effective method, we have searched a lot on the web and inquired many experienced WordPress users who have successfully installed this program manually. According to the information we got online and from real persons, we worked out the following tutorial to show the detailed manual WordPress installation.
Download & Upload WordPress Files
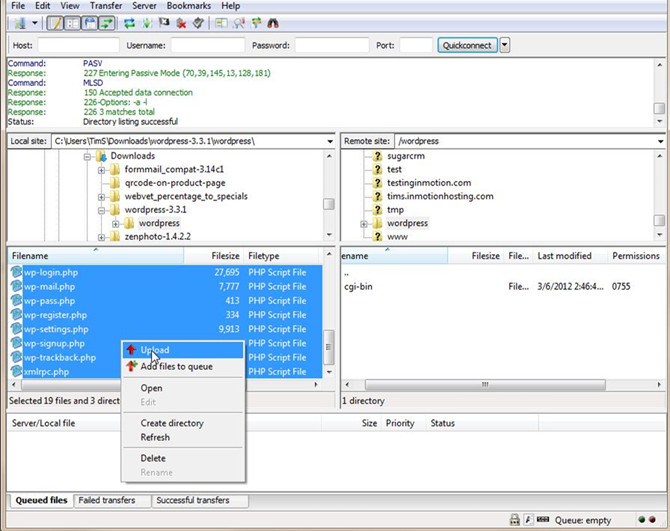
The first step you need to go through is to download WordPress package into your own computer from http://wordpress.org/download/. Then, decompress the package to a folder that is easy to find. The next step is to upload the WordPress files you have downloaded and decompressed. You are able to upload the files to your hosting account with several options, via an FTP client, File Manager or SSH. Here, we suggest you to upload it via an FTP client.
For example, if you are using FileZilla, you just need to log into your FTP control panel, drag the files and pin them to the frame at the bottom of left. Then, select all the files, right-click on them, and click “Upload” to upload files.
Create a MySQL Database and User
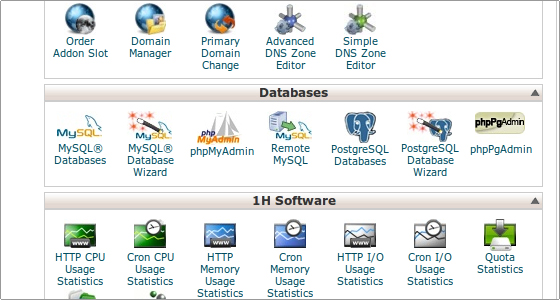
Once you have successfully uploaded WordPress files, go to your control panel to create a MySQL database and assign a user that is with no limits. Because we are using cPanel to manage our site and account, we will show you the steps of creating a MySQL database and user in cPanel.
Log into your cPanel account and scroll down to the DATABASE part. Then, you are able to see several items, click MySQL Databases icon.
After clicking MySQL Databases icon, you can see a page like below. To create a MySQL database, you need to type the name you desire in the blank rectangle behind “New Database”. Then, click “Create Database” button.
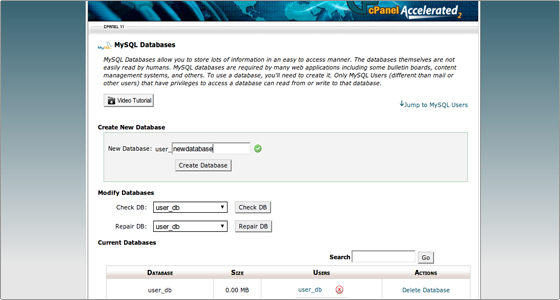
Now, you are able to see a confirmation screen telling you that you have successfully created a database.

Click “Go Back” button on the confirmation screen to add a new user. In the new screen, you need to fill the name you want to use as a username and type your password twice. Remember to type a password that is strong enough. Then, click “Create User”.
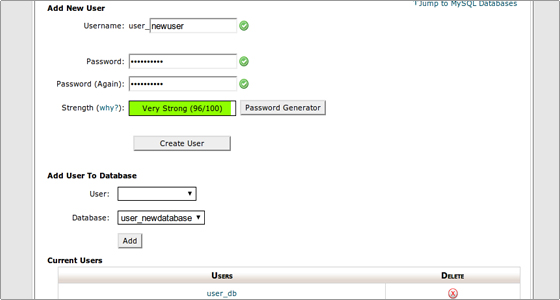
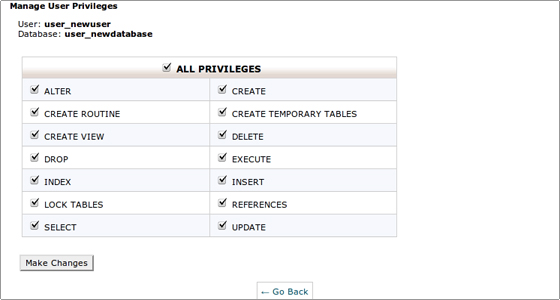
After creating a user, you will be redirected to a screen showing many privileges. Then, you need to select the privileges you want to have and click “make Changes”. Besides, you are also allowed to choose all privileges.
Finish WordPress Manual Installation
Once you have successfully created a MySQL database and a user, go to yourdomian.com. Then, you can see a message telling you that you should create a wp-config.php file. Click “Create a Configuration File”.

After click “Create a Configuration File” button, you are able to see a new page showing that you need some items before going on. Because you already have those items, you just need to click “Let’s Go” button to proceed. After this, a new page appears, in which you need to type your database name, user name, password, database host and table prefix. Then, click “Submit” button.

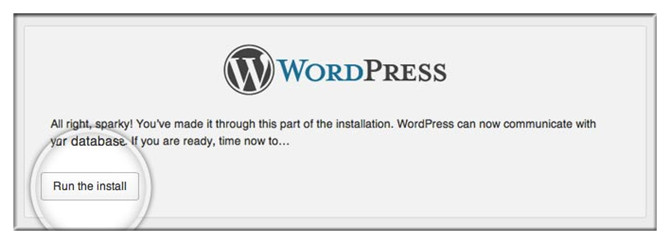
Once you have pressed “Submit” button, WordPress will start to check whether the information you typed are correct. If all information you entered is right, you can see a confirmation screen. Then, click “Run the install” button.
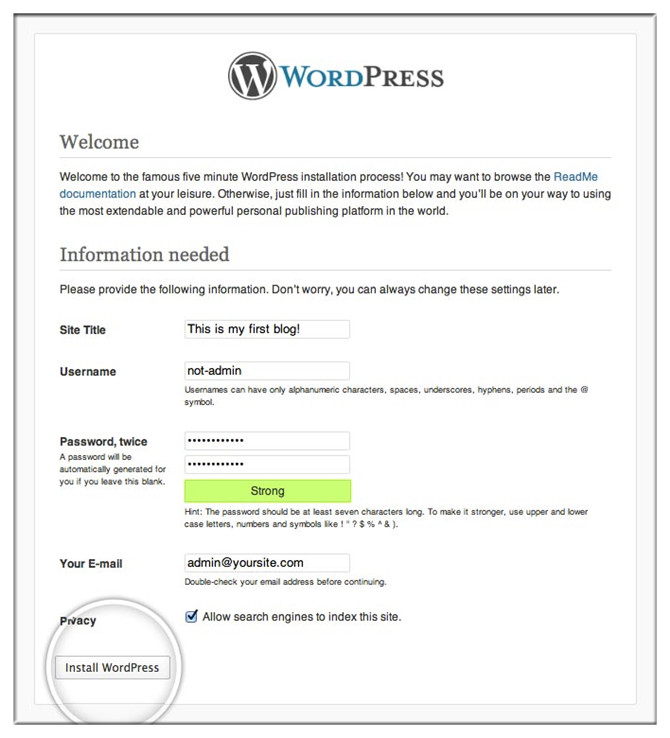
At this time, a new screen appears, on which you have to type the title of your new site, your administrative username and password. Besides, you need to enter an available email account which can be used in case you forget your password. In addition, you can specify whether you want search engines to index your site. After finishing entering your information, click “Install WordPress” button. Then, you have successfully installed WordPress manually.
Conclusion
Following the steps we listed above, you are bale to install WordPress manually easily. After this, you need to choose some premium simple WordPress themes to beautify you site. If you don’t know how to install a WordPress theme, you are bale to refer to one of our precious articles. In addition, you need to choose a reliable security plugin or a backup plugin to enhance site security and select a cache plugin to speed up your site.
Related Posts
 How to Use phpMyAdmin to Backup Database
 How to Rename WordPress Database Through phpMyAdmin
 Tips on How to Change WordPress Username and Password
 How to Export and Import a Database Using phpMyAdmin
 How to Reset WordPress Admin Password by Using phpMyAdmin
 How to Download & Install phpMyAdmin
 How to Set up a Forum Using Joomla?
 Add an Admin to WordPress Using SQL Queries via PHPMyAdmin