Since categories vs tags becomes a hot topic among WordPress users, more and more people get confused about how to make a decision. In this case, we make a guide on how to use categories and tags in WordPress to help readers master the skill on the use of both two methods properly. Before everything, let’s have a quick look on why use categories and tags.
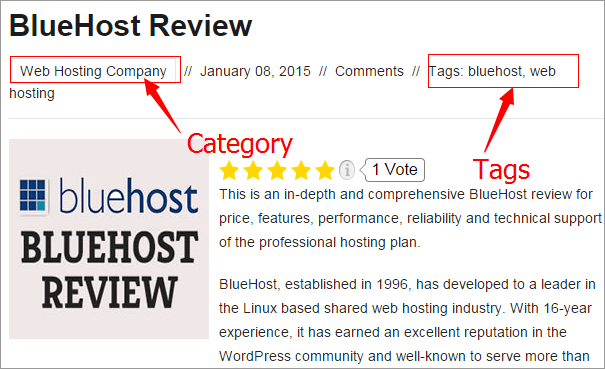
Categories are used to classify all web content into different groups so as to make it well-organized. In this way, visitors are able to know exactly which group the post is sorted into and then have a rough idea of the main points. Besides, WordPress allows you to sort a post into several categories and gives you more flexibility. For instance, if you are running a web hosting resource website as HostingReview360.com, then the categories should be review, comparison, tutorial, promotion, plugins/themes, etc.
Tags are regarded as index words and used to give a specific description to the posts, with which the post is more like to be searched by web crawlers. And also, it is also a great method to help visitors know your web content generally. For example, we have made a BlueHost review and that should come with the tags like bluehost review, bluehost, web hosting review, and something related to the content.
How to Use Categories in WordPress
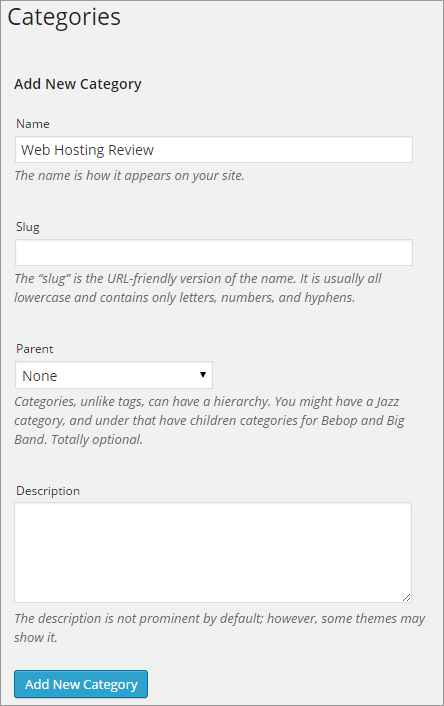
There is no need to handle any professional skills to add categories to your website. Even for beginners, it is simple to finish the whole process. On the WordPress Dashboard, the Categories option is included in Posts and this is where to add and edit categories. Go to Posts > Categories and enter the name of a new category. Here, we name the category as “Web Hosting Review”, which is used to include all hosting reviews. And then, click Add New Category button.
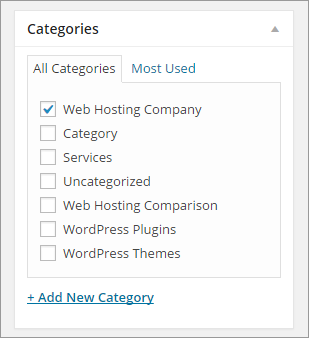
Note that, you are allowed to add as many categories as you want. And then, go to Posts > All Posts. You are required to sort all posts into proper categories. For instance, we are going to classify the BlueHost review into Web Hosting Review category. Click Edit and check the box near Web Hosting Review. WordPress also enables you to add categories by click the “Add New Category” option.
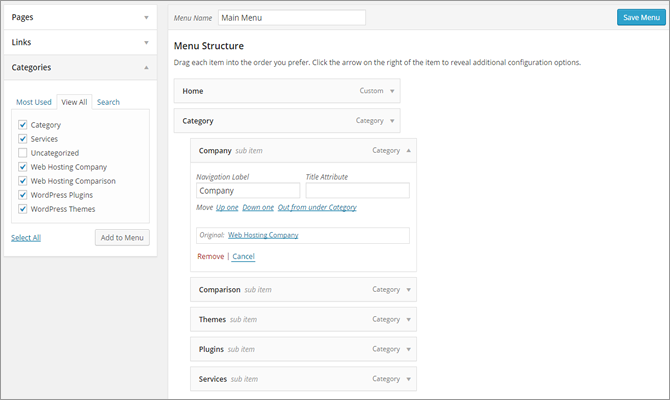
If you need to showcase the categories on the menu bar, then you should go to Appearance > Menus and add the menus to Menu Structure. And then, manage the added categories in a proper way. You can edit the navigation label and title attribute by clicking the triangle icon. Click Save Menu to confirm all changes.
How to Use Tags in WordPress
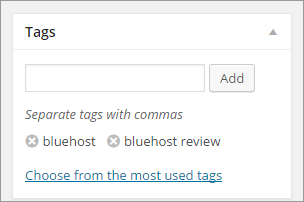
Go to Posts > All Posts and add tags to each post. Here, we also take BlueHost review as an example. Click Edit and find out the Tags option. We would like to enter “bluehost, bluehost review” in the tags field and then click Add button. Note that, you are allowed to add more than one tag at one time and separate all tags with comma.
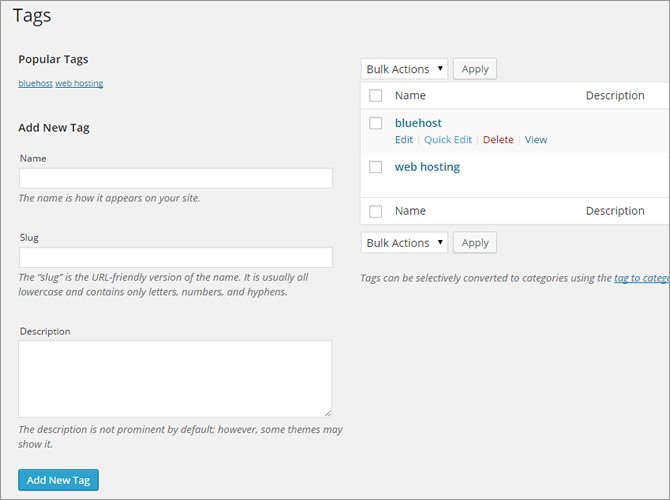
The Posts > Tags is where to show all tags that you have added on the posts as well as edit or delete the existing tags. Besides, this is also where to add new tags. To do this, you are required to name the tag and that should be related to the post. And then, fill out the slug and description as required. Click Add New Tag button to confirm all information.
Maybe now, you have gotten the right way to use categories and tags in WordPress. Thus, it’s time to apply this guide to practice.
