
WordPress, as the industry-leading CMS (content management system), enjoys high reputation and popularity for a great number of webmasters ranging from small business merchants, freelancers, corporations, bloggers to large companies. However, some people who lack related knowledge background may have met troubles in starting a WordPress blogging, business or resume site by themselves because it means that they have to install, configure and optimize the current WordPress site.
To say the least, to get WordPress started on the site is also not an easy task as it needs a web host which supports PHP versions 5.2.4 or greater, MySQL version 5.0 or greater, mod_rewrite Apache module, as well as at least 64 MB of PHP memory_limit. In this case, we highly recommend BlueHost, as it not only far exceeds these above mentioned basic technical requirements to run WordPress, but also offers a large number of beneficial extras like free domain name, self-built 1-click WordPress installer called SimpleScripts.
In the further, we have prepared a detailed tutorial which includes the guide from how to get your WordPress site started with BlueHost to customize the WordPress blog, business and resume site in sequence, just as an example. We hope the information could help make things easier.
How to Get WordPress Site Started?
Having been awarded as the best WordPress hosting company by WordPress official site – WordPress.org, BlueHost makes it quite free-of-hassle and easy to start a WordPress site by leveraging the power of the mentioned SimpleScripts – a user-friendly 1-Click automated application installer in the web hosting industry, which supports to 1-click set up 150+ popular software in the latest version in 30 seconds.
In below, there are several simple and practical steps needed to get WordPress site started with BlueHost and it doesn’t require any technical knowledge and website deployment experience.
Step 1 – Sign Up a Hosting Account
 BlueHost, founded in 1996, is offering its WordPress hosting plan which is priced at $7.99/mo regularly. But now the company offers a special price of $3.95/mo for those who are going through this exclusive BlueHost promotional link. There comes 1 free domain name, the support for hosting unlimited WordPress sites and park unlimited external domains on each account, and $100 Google AdWords credits, $50 Facebook advertising credits and YellowPage list service for free.
To get a BlueHost account, you only need to login to http://www.bluehost.com/wordpress, click the Sign Up Now button, enter your domain name, and choose an appropriate billing circle (We personally recommend you going with the 3 year plan, as you can save as high as $108 in one time). After the sign-up process is completed, you’ll get an email which carries all your login information.
Step 2 – Choose an Appropriate Domain Name
This process has often been ignored by many webmasters. In fact, the selection of your domain name for your WordPress website is a critical part of your online marketing, social networking or hiring strategy. Even Steve Dalton – director of Golden Technologies – has said “Your digital address is as important now as any of your key brand communicators.” But how to pick an effective domain name for your business, blog or personal resume website? Here are some simple principles.
- The domain name must be original, and cannot infringe on anyone else’s copyright.
- It needs to be short as short domain names are easy to remember and type.
- It should be easy to pronounce and spell.
- Include relevant keywords in your domain name like the type of goods you are selling.
- Choose TLD (top level domain) which ends in .com, .net, or .org.
Step 3 – Login to Your cPanel Control Panel
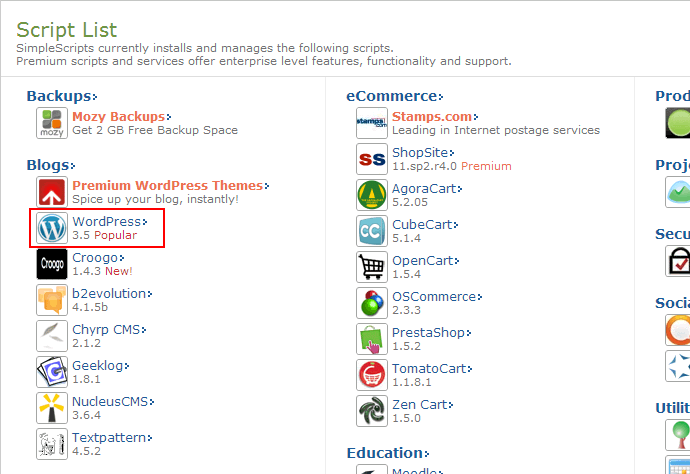
Login to your cPanel and find the Site Builders section as the following screen shot.
<
Then, click the SimpleScripts icon to go in the Script list page, find and click the WordPress icon. In fact, BlueHost shall simplify this step as soon as you click the WordPress icon in the BlueHost WordPress hosting control panel main page. However, it’s true that BlueHost supports 1-Click installation for over 150 applications. Whatever you need a blog, personal resume, e-commerce, forum, small business web presence, you can get started soon with BlueHost.
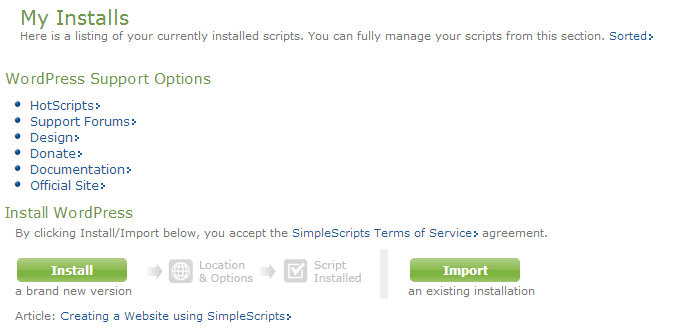
Step 4 – Install WordPress
Click the button that says “Install” going to the next step.
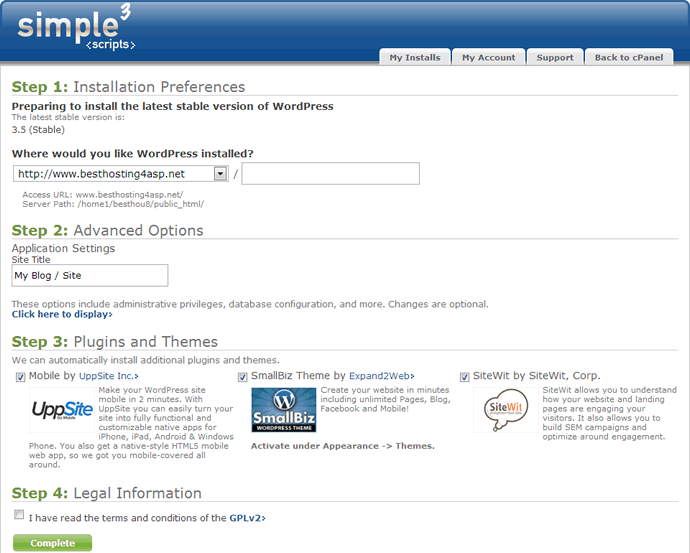
Step 5 – Installation Confirmation
This part contains 3 steps: choose a directory to install WordPress, name your website, and decide plugins and themes. You only need to fill out the blacks according to your real situation, but remember that WordPress should always be installed on the root directory, and the domain name of your site should be SEO-friendly.
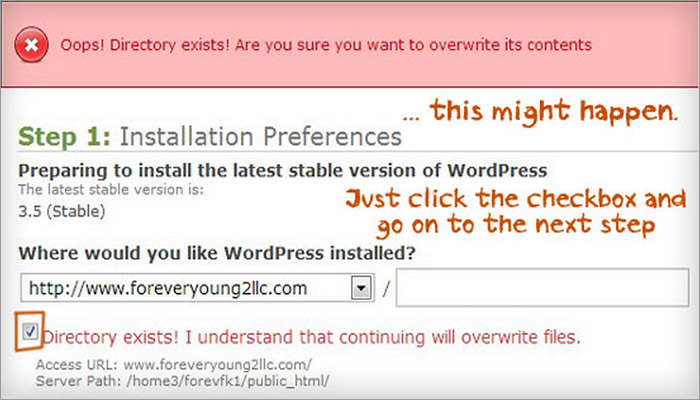
Sometimes, you may encounter an error page like the following screenshot. Don’t worry, just click the check box and then the Complete button.
Step 6 – Get Your WordPress Site Live
Yeah, wait for 30 seconds. After WordPress installation completed, there appear the WordPress administration page URL and admin user name & password in the congratulation page as well as you will get the notification via email sent by BlueHost..
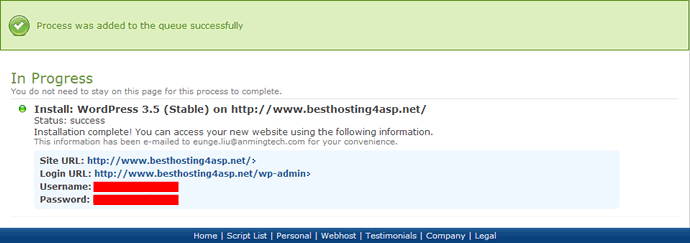
By the way, we suggest you change your password at the first time you log into your WordPress Dashboard. It may take a few seconds, but is helpful to fight against hackers.
Having done the mentioned steps above, you have successfully get your WordPress site started.
As you reading through this tutorial, the WordPress site installation is quite simple when you choose the BlueHost WordPress hosting plan. Since you have built up your WordPress site, it seems more easy and simple to customize your WordPress blog, resume and business site. In below, we would like to give our cordial suggestions and tips for them respectively.
How to Start a Blog WordPress Site
In terms of starting a new blog site on the current WordPress site, there are a total of three steps you need to take. To make things straightforward, we also list the detailed requirements and steps as follows in an orderly manner.
Step 1 – Configure the WordPress Blog
 First of all, you need to configure the WordPress blog site so as to make it more pure and secure before posting. In details, we suggest you to finish the following things once you login to your new blog.
- Add New Users to the Blog. Comparing to a custom username, the default admin user is more likely to suffer from attacks. In this case, you can create a new username for yourself and give it the administrative privileges. Then, if you want more contributors and authors for your blog, you can also add some other new users to the blog and set the privileges.
- Change the Settings of Comments. Spam comments are an inevitable problem for blog, but a proper setting can effectively help reduce spammy attacks. Under Settings – Discussion, you can choose whether visitors need to login before leaving a comment, whether to close comments automatically after a certain period of time, or the comments with which words should be marked as spam. It completely depends on you to change the configuration as you like, but we suggest you make sure the visitors have to be registered and logged in for comment.
Step 2 – Customize the WordPress Blog
Secondly, you are required to customize your WordPress blog. As WordPress is completely flexible, so users can customize their blogs in many ways. If you are specialized in this field, you may choose to customize the blog by editing the code manually. In the case that you are a beginner not knowledge in coding, you also have a great number of options since WordPress has an extensive community filled with thousands of free WordPress themes and plug-ins. What you need to do is only to install the one you like on your blog.
- Installing WordPress themes and plug-ins is as easy as picking a wall paper for Windows desktop if you follow the instructions below. Search the Internet for free WordPress themes/plug-ins you need, then download the files to the desktop.
- Login to your blog and expand the menu option of Appearance/Plug-ins. Click on the button that says Add New Theme/Add New.
- Click on upload at the top, browse your computer for the theme/plug-in downloaded before and Install Now.
- When the installation has been completed, click on Activate. Now you have customized your blog with a new theme or plug-in.
 As known, the WordPress plug-ins are designed to extending the functionality of WordPress to make blogging easier. Here, we have some recommended plug-ins.
- WP Super Cache, a caching engine working to speed up the WordPress blog.
- Akismet, a spam comment killer automatically checking your comments to catch the spam.
- All in One SEO Pack, a helpful plug-in automatically optimizing your WordPress blog for search engines.
- UpdraftPlus Backup, a backup plug-in which can improve security by backing up the blog files and database into the cloud.
Step 3 – Create New Posts and Pages in the WordPress Blog
Lastly, you need to write posts and create new individual pages are both easy and sharing the similar steps. Now we see how to do them step by step.
- Login to your WordPress blog.
- Expand the menu of Posts/Pages and click on Add New.
- Type the title of your post/page in the small top box, and enter your main content in the large box, then click on Publish to save your new post/page.
- If you want to edit a post/page you have already published, you can select edit under the Posts menu.
Now the blog is completely under the control because you have learned how to manage every aspect by yourself. In below, we would like to introduce how to choose a reliable web host for a self-hosted WordPress blog.
How to Set up a Small Business Web Presence
To build a business website by utilizing WordPress is the easiest way, as it is an amazingly powerful publishing tool, which makes adding or updating the content on your site an easy thing with the simple text editor. Besides, there are hundreds of e-commerce WordPress themes available online, so you can beautify your site to make it look professional and attractive.
 On the other hand, finding one which suits your business best is not easy. But don’t worry! Here, we have given you some guidelines you need to take into account when selecting your WordPress theme.
- The theme you choose should have a simple but professional design, with which you can effectively showcase your goods, and site visitors can easily find what they want.
- As most of the WordPress themes are versatile and are applicable for multiple niches, you need to choose one that matches your industry to the largest extent.
- A good WordPress theme need to give the full freedom to customize your website as much as you want, including the background colors, sizes of sidebars, pictures of headers, and more.
- Before downloading or purchasing your preferred theme, you would better to clicking through the demo site to see how it works. This process may take you some time, but is indeed necessary.
 College Students’ Choice – Start a Personal Blog with
 How to Migrate a WordPress Site from WordPress.com to Be Self…
 Beginner’s Guide to WordPress Multisite Domain Mapping
 How to Add an Opt-in Form to Your WordPress Site
 Differences among Sub, Parked, and Addon Domain
 Benefits of Using WordPress For Web Presence
 How to Create a New Email Account in vDeck, cPanel & Plesk
 How to Allow Users to Login with Email in WordPress
How to Build Personal Resume Website
Due to the fact that more and more HRs are performing online searches to find their prospective employees, it’s time for you to set up a professional personal resume website with WordPress, as it can help you clearly demonstrate your experts, strong points, and what you can bring to the company, thus stand out from the competition.
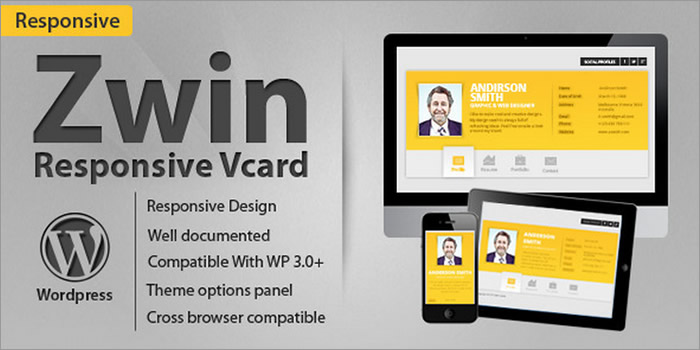
Back to our topic, to build a personal resume website, you are required to install a resume theme firstly. Click through the site URL you received from BlueHost, and go to your brand new website. Here, we recommend you using ZWIN – a professional WordPress theme for a resume site.
After downloading the theme, now you can log into your site by going to your domain name and putting /wp-admin after it. Enter your username and password, and open up your WordPress admin panel.

Now, scroll down to the Appearance tab at left of the dashboard, and then click on Themes. Click on Install Themes which is at the top of the next screen, and then Upload button which gives you an option to upload a zip file. Choose the file named zwin.zip and go Install Now. Don’t forget activating it after the uploading process is completed.
At last, click Zwin button in the dashboard, and then enter your personal information, change the head portrait, present your skills, education, working experiences, and configure the colors, fractions, background image of your site as you want. Remember that click the Refresh button after all the changes have been done. Now, you have successfully set up a personal resume site.