As one of the most popular video sharing website, YouTube has been trusted by millions of people to share their daily life and some odd news. And now, many webmasters tend to embed YouTube videos in their WordPress website and wish to display video thumbnails on the web page orderly. It has been regarded as a great method to draw visitors’ attention and help them lock the target content easily.
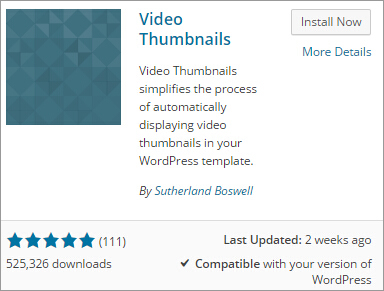
In this guide, we are going to show you how to display YouTube video thumbnails with WordPress plugin. Note that, the plugin selected here is Video Thumbnails, which is used to showcase all video thumbnails in your template automatically and let people view the video snapshot at a glance. In addition to YouTube, this great plugin also applies to Facebook, Vimeo, Google Drive, and so on.
Enable Video Thumbnails for Your Website
To save time and trouble, we suggest you to install and activate this plugin via WordPress Dashboard. Go to Plugins > Add new, and seek out Video Thumbnails. Install this plugin and then activate it in real time. And then, a new item called “Bulk Video Thumbs” appears under Tools while another item called Video Thumbnails is included in Settings.
Take a Good Use of Video Thumbnails
Go to Settings > Video Thumbnails and enter the Video Thumbnails Options dashboard. There are five tabs available for you, including General, Providers, Mass Actions, Debugging and Support. Follow the prompts to check the “Save Thumbnails to Media Library” and “Automatically Set Featured Image” if needed.
The first option means all thumbnails are stored in Media Library by default while the second option make featured image the same with video thumbnail. And then, check the post types or custom post types to be scanned for videos. “Save Changes” since you have all settings done.

The next tab is “Providers”. The listed providers require you to enable an API key so as to work with them smoothly. For example, if you share videos with Vimeo, then you need to “Register an app with Vimeo” and fill out some information as required. Since we plan to showcase the YouTube video thumbnails, we skip this option and move to “Mass Actions”.
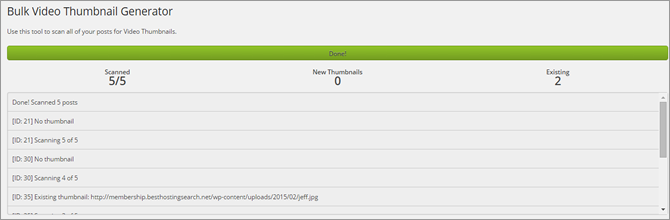
“Mass Actions” is where to scan all posts that include thumbnails and remove all video thumbnails from the posts. Click “Scan Past Posts” button and turn to Tools > Bulk Video Thumbs automatically. Scan all posts to check how many thumbnails existing on your website. For the needless thumbnails, you are allowed to go back to Settings > Video Thumbnails > Mass Actions and “Clear Video Thumbnails”.
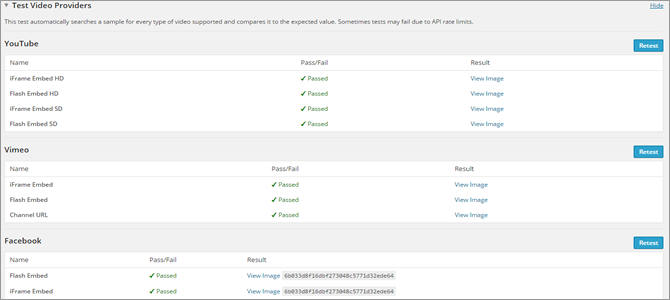
The “Debugging” tab includes several tests used to detect any problems with video providers, certain videos and local media library.
Test Video Providers helps you test which type of video is available on your website. Subject to API keys, some video providers fail to work for your website properly.
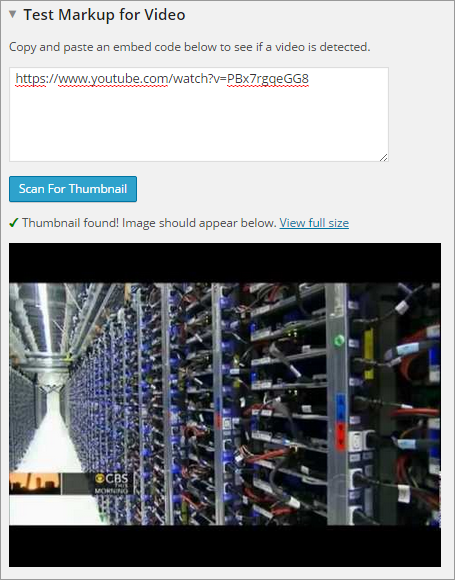
Text Markup for Video is where to check if there are any videos left to be detected as well as view the video thumbnail. You just need to copy and paste the video URL and click “Scan for Thumbnail” button.
Test Saving to Media Library is where to check if there is something wrong with the process of saving a remote thumbnail in local media library.
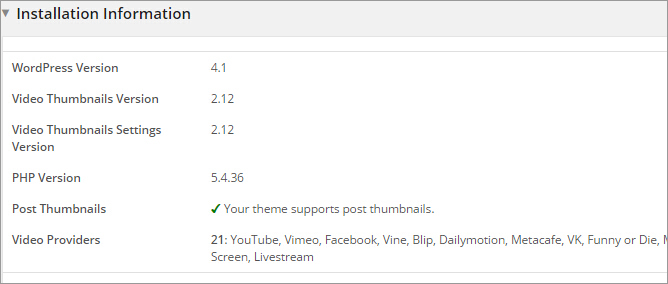
Installation Information, as its name suggests, is where to check the specific information of this plugin, like WordPress version, video thumbnails version, video providers, and so on.
What’s more, the “Support” tab is a great option for fixing “No video thumbnail for this post”.
After having a comprehensive understanding about Video Thumbnails, you are required to test whether this plugin works on your website properly. Go to Posts > Add New and embed a YouTube video in the blank. And then, a video thumbnail is automatically generated as the following screenshot.
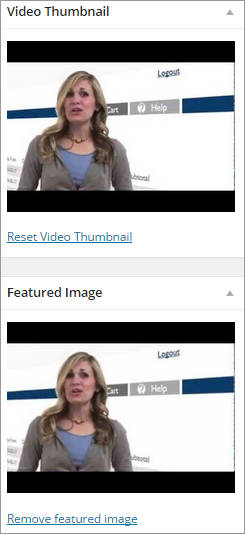
As we can see in the above-mentioned screenshot, the video thumbnail is same as featured image. If you are not satisfied with this design, you can “Remove featured image” and upload a preferred one. Perhaps, you can go back to Settings > Video Thumbnails > General and uncheck the option “Automatically Set Featured Image”. If to do so, the thumbnail shown on the website frontend should be like as below.

If Your WordPress Theme is Not Available for Video Thumbnails
Fortunately, the theme activated for our WordPress website is available for displaying video thumbnail. However, if such a lucky thing not happens to you, then you are required to make some change on your active theme. Go to Appearance > Editor and add the following to the style.css file. Finally, click “Update File” button to confirm all changes.
<?php the_post_thumbnail(); ?>
Follow the previous steps to create a new post and add a YouTube video to it. And then, check if your theme is able to showcase the video thumbnails automatically.
Display YouTube Video Thumbnails Manually
WordPress Video Thumbnail plugin enables automatic thumbnail generation on your website so as to save you a lot of trouble. However, if you are not satisfied with the default thumbnails and wish to make the decision personally, you might as well refer to the second method to display YouTube video thumbnails manually.
Before everything, you need to capture an image when watching a video. Note that, this snapshot should be attractive and high definition. And then, resize this image properly and use it as your featured image. Since you embed this YouTube video in a post, you need to set the the snapshot as featured image. Confirm all settings by clicking “Update” or “Publish” button.
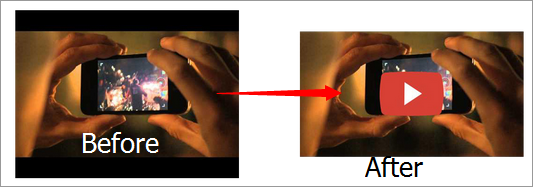
Unlike the automatically generated thumbnails, the manually created one are not come with play buttons. In this way, visitors cannot open videos because there is no play button shown on thumbnails. To add a play button on video thumbnail, you should follow the guide as below.
Firstly, find out the code line shown as below via Appearance > Editor > archive.php/index.php/content.php/category.php file.
<a href="<?php the_permalink(); ?>"><?php the_post_thumbnail(); ?></a>
And then, replace the above-mentioned code to the following code.
<?php if ( in_category( 'video' )) : ?>
<a href="<?php the_permalink(); ?>"><?php the_post_thumbnail(); ?><span class="playbutton"></span></a>
<?php else : ?>
<a href="<?php the_permalink(); ?>"><?php the_post_thumbnail(); ?></a>
<?php endif; ?>
You should search for a play button image on the Internet and then upload it to Media > Add New. Add the following code to Appearance > Editor and replace the background URL to the newly uploaded play button image URL. Update this file and check if the play button is able to hover over the video thumbnail properly.
Honestly, if you plan to add a large number of videos on your WordPress website, you have to consider whether there is enough room for such large capacity. Here, we would like to recommend some excellent WordPress hosting companies that provide customers with limitless hosting resources and guarantee fast & secure hosting environment.
Related Posts
 How to Embed Video in WordPress Sites to Richen the Content
 Best WordPress Youtube Plugins That Make It Easy to Embed and…
 in WordPress") Beginner Guide for Using Featured Image (Post Thumbnail) in…
Beginner Guide for Using Featured Image (Post Thumbnail) in… Best Video and Multimedia WordPress Themes
 Best Photo Gallery Plugins for WordPress
 How to Use and Customize WordPress Audio Player?
 How to Make WordPress Pages and Posts Print Friendly
 How to Replace Image and Media Files in WordPress Easily